Saturday, December 8, 2018

Nixie Tube Fun

I've always wanted to tinker around with some nixie tubes. I acquired some IN-18 tubes about 15 years ago, and just kind of ignored them. I have finally started tinkering with them.

The first thing I needed to do before I could even do anything with the Nixie Tubes, is build a power supply that is capable of driving them.

I utilized DIYLC (Do it Yourself Layout Creator) to design the layout of the strip-board.

Circuit Layout designed with DIYLC:

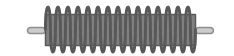
DIYLC was missing an Axial Lead Inductor on it's component palette.  I ended up using Java to create my own component.

Inductor I Added:

This is my first circuit built on strip-board. I am a tad messy, hence the reason why I am opting for Strip-Board instead of etching a PCB. You can see where I accidentally laid it on my hot iron. I made a few placement mistakes and and I did not feel like unsoldering, so I utilized DYLC to move some of the components around to accommodate my mistakes.

Circuit built on Strip-Board:

Finally, I was able to load test the circuit, to make sure that it would drive four nixies.

Load Testing Circuit:

I'm pretty clumsy, so I designed a tube socket holder for the nixie tubes:
- Thingiverse IN-18 Nixie Tube PL31p Socket Mounts

Holder:

I also mounted everything to a board, while tinkering, because of the very same reason.

Wood Board:

Video:

Logic:

I am utilizing an Adafruit HUZZAH ESP8266 Breakout board to control what is displayed on the tubes.

https://github.com/jefferoonie/ESP-Huzzah-Nixie-Tube-Clock

ESP8266 → MCP23017 → K155ID1

Breadboard rats-nest to PCB:

Decided to have a PCB made, so that I could get rid of the rats nest that is hanging out on that breadboard.

Drew Schematic:

Routes:

Blank PCB Arrived:

Populated PCB:

There are many things that I would have done differently like:

  • Better labeling and marking of polarity, and etc.
  • Bigger screw holes.
  • Maybe flipped two of the BCD chips.
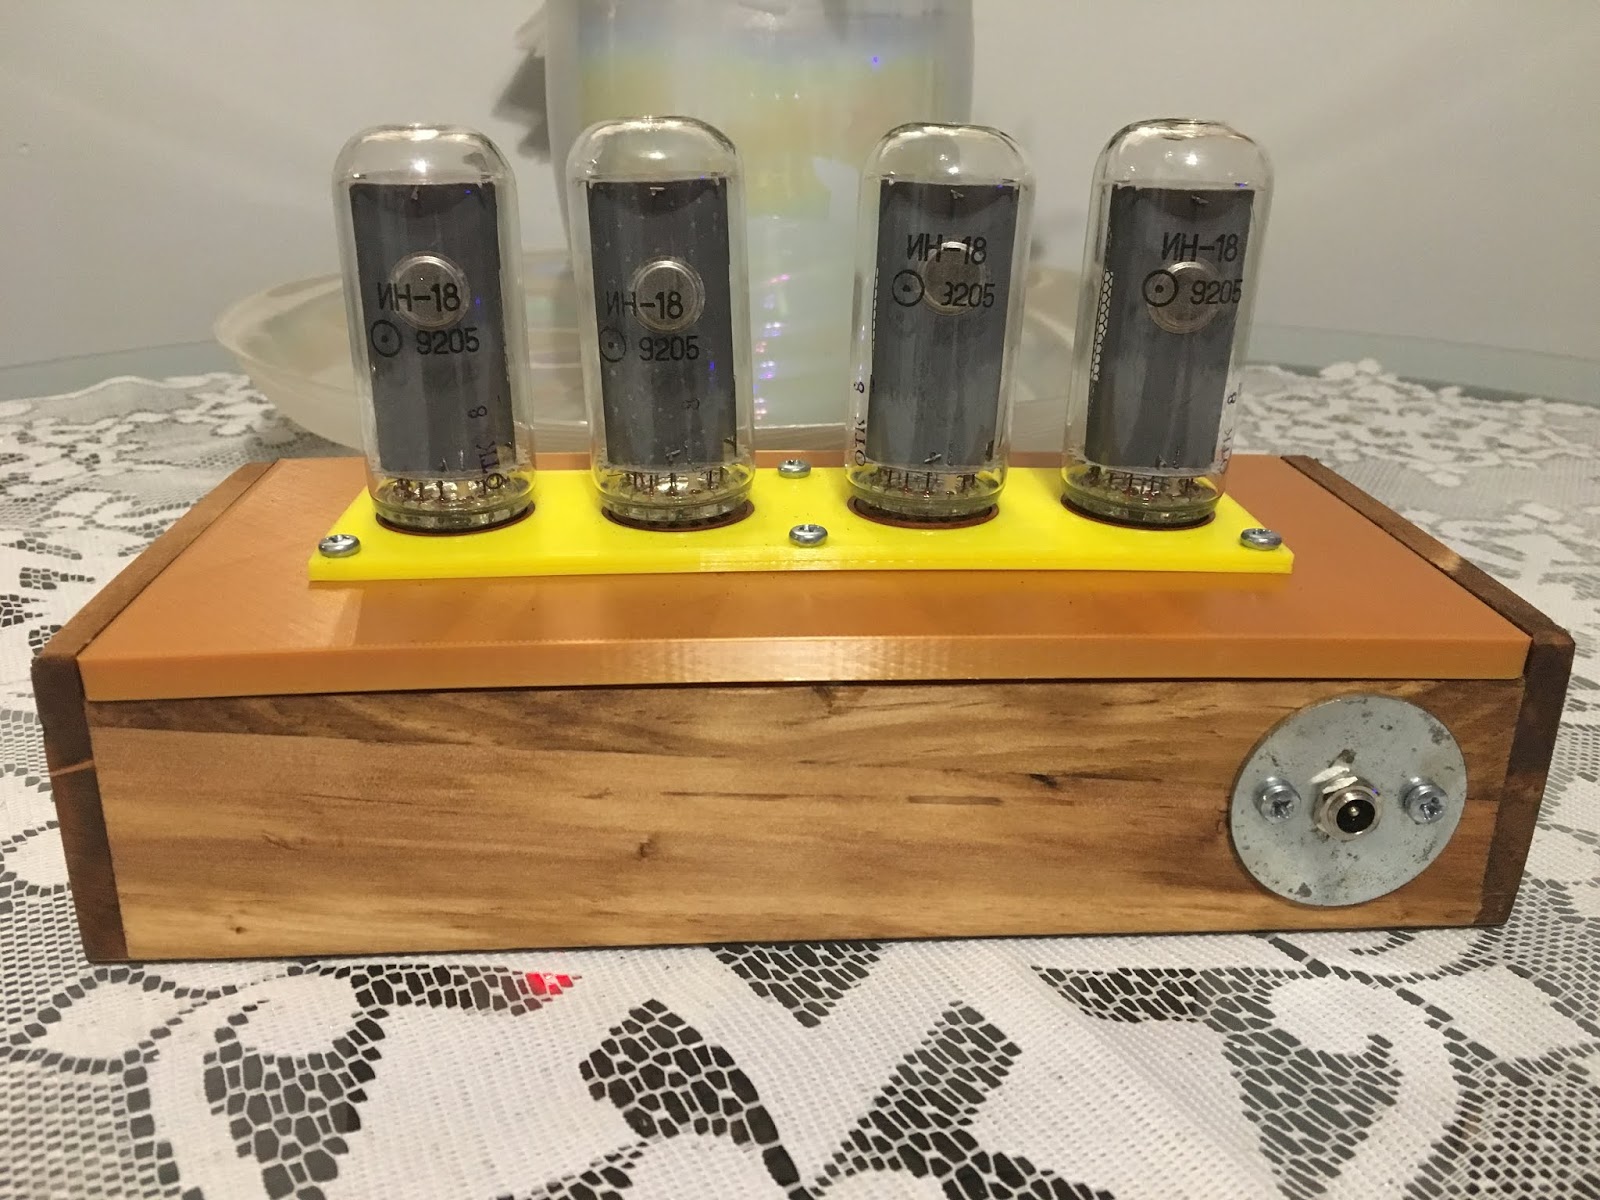
Finished:
Ended up making the finished housing out of a wood box from Hobby Lobby.
Drew up, and printed a top of the box, based on my previous tube socket holder:
IN-18 Nixie Tube PL31p Socket Mounts - Hobby Lobby Box Lid

Update: Webserer Controls
Decided to throw a web-server on it, for changing time zones, and daylight savings. It captures the offset that correlates with the time zone, and puts it into the emulated EEPROM. The code in Github has been updated to reflect this
Ugly, but works for me.

Saturday, May 19, 2018

HAM Hero!

Something just came on TV about Amelia Earhart.  It reminded me of someone that I knew as a kid, that was influenced by Amelia.

Fern V. Fisher (Call Sign: W9LCJ) was an interesting person from Racine, that was a pilot, flight instructor, mechanic & radio tech.

I used to live by her as a kid, in the 80's. She is one of the people that kind of guided me into the world of computers & electronics.  Little did she know that I would end up making a career out of it.

Fern used to bring me to the HAM swap meets, so that I could bring home a bunch of electronic goodies, to tinker with. I also received a few electronic kits from her, like the Radio Shack 150in1. Even gave me an aircraft receiver.  I just remember that the antenna was a phono plug, so I had to get a phono to F connector, in order to connect it to the rooftop TV antenna.  Yes, I know now that the impedance was probably off.

I was also recently asking a friend, Blake, about amateur radio stuff, and she came to mind. I'm pretty sure my brother remembers me going through the trash, when she tossed out electronic goodies. :P

Still remember when she shook my hand and said, "You shook the hand that Amelia Earhart shook."

Learn About Her:
40 years at Batten
A passion for flight: Local aviation pioneers join Hall of Fame
Obit: Fern Viola Fisher (Call Name W9LCJ)
Southeastern Wisconsin Aviation Hall of Fame

Update June 21, 2019:
I was at the EAA Chapter 838 Museum, and stumbled on some pictures & information. She was inducted into chapter 838's hall of fame, back in 1999.  Took some pictures of them with my phone, so the quality is not the best.  Click on them to enlarge.

Working on a Cub, circa 1943:

Fern with the same Cub (NC37905) in 1991:

A chic Fern Fisher with her Cub Coupe:

Fern with one of the Cubs she flew as an instructor during World War II:

Working the unicom in 1985:

Misc Photo:

Hall of Fame Letter:

Tuesday, February 27, 2018

TI-99/4A & HDX (Dsk2Pc)

I have been playing around with Fred Kaal's HDX server programs, for the TI-99/4a.  Just testing out the DSK2PC portion for a friend.  I don't have a windows machine, so I had to utilize Wine for Linux.

Software:
Hardware:
Wine Notes:
In order for an application running under Wine to see COM1, I had to had a symbolic link:
ln -s /dev/ttyUSB0 ~/.wine/dosdevices/com1

TI Steps:
  1. Boot the Extended Basic v2.7 Cart
  2. Take option [B: TI Writer/Assembler]
  3. Take option [6: RUN PROGRAM FILE]
  4. Enter: DSK1.NPDSK2PC
DSK2PC: File Sent

HDX Server: File Received

Console File Listing: On HDX server, after transfer:

Friday, December 29, 2017

Raspberry Pi 3 Experimentation

I've always wanted a Raspberry PI, but I have never bought one for myself, because I didn't have any plans.  I still do not have any plans, but it will be fun to tinker with, so bear with me.

My father in law gave me one, for Christmas, along with a bunch of goodies to tinker with.

Toys used so far:
  • Raspberry Pi 3,Model B, 1gb RAM
  • Kuman 5 inch Resistive Touch Screen 800x480 HDMI TFT LCD Display
  • Kuman RPI Powerpack v1.2
  • Rii H9S Mini 2.4Ghz Wireless Keyboard
Pi booted into Raspbian, and checking out the command prompt:

As you can see, the screen is chopped off, on the right side. 

I order to remedy this, I added the following to [/boot/config.txt]:
hdmi_group=2
hdmi_mode=87
hdmi_cvt 800 480 60 6 0 0 0


Pi Assembled to Kuman RPI Powerpack:

Utilizing GPIO Extension Board:

This board is where the real fun/experimentation starts. Yes, I like to start small.

Python script to test the LED:
## Import GPIO library
import RPi.GPIO as GPIO

## Use BCM (more later) pin numbering
GPIO.setmode(GPIO.BCM) 
GPIO.setup(5, GPIO.OUT) 
GPIO.output(5, False)

Ended up moving this onto something that was more self contained:


Wednesday, November 30, 2016

TI-99/4A & Woods WiOn IOT Home Automation Testing

So, I decided that I would expand on this past experiment:
Woods WiOn Indoor Wi-Fi Outlet Modification (Amazon Echo Too!)

***NOTE*** This is a work in progress, and who knows where it will go as it is just BSing around.

I wrote a different program, utilizing the Arduino IDE, that would allow my TI-99/4A to make a connection to this device, utilizing Stuart's Web Browser.

WiOn_TI99 ESP8266 Arduino Code:
#include <ESP8266WiFi.h>
#include <WiFiClient.h>
#include <ESP8266WebServer.h>
#include <ESP8266mDNS.h>

const char* ssid = "FrogFi";
const char* password = "**********";

ESP8266WebServer server(80);

const int relay = 15;

void handleRoot() { 
  Serial.println("test");
  server.send(200, "text/html", "<99ml><p>TEST</p></99ml>");
}
void handleNotFound(){
  digitalWrite(relay, 1);
  String message = "<99ml><p>File Not Found</p></99ml>";
  message += "URI: ";
  message += server.uri();
  message += "\nMethod: ";
  message += (server.method() == HTTP_GET)?"GET":"POST";
  message += "\nArguments: ";
  message += server.args();
  message += "\n";
  for (uint8_t i=0; i<server.args(); i++){
    message += " " + server.argName(i) + ": " + server.arg(i) + "\n";
  }
  server.send(404, "text/plain", message);
  digitalWrite(relay, 0);
}

void setup(void){
  pinMode(relay, OUTPUT);
  digitalWrite(relay, 0);
  Serial.begin(115200);
  WiFi.mode(WIFI_STA);
  WiFi.begin(ssid, password);
  Serial.println("");

  // Wait for connection
  while (WiFi.status() != WL_CONNECTED) {
    delay(500);
    Serial.print(".");
  }
  Serial.println("");
  Serial.print("Connected to ");
  Serial.println(ssid);
  Serial.print("IP address: ");
  Serial.println(WiFi.localIP());

  if (MDNS.begin("esp8266")) {
    Serial.println("MDNS responder started");
  }

  server.on("/", handleRoot);

  server.on("/on", [](){
    server.send(200, "text/html", "<99ml><p>ON</p></99ml>");
    digitalWrite(relay, 1);
  });

  server.on("/off", [](){
    server.send(200, "text/plain", "<99ml><p>OFF</p></99ml>");
    digitalWrite(relay, 0);
  });

  server.onNotFound(handleNotFound);

  server.begin();
  Serial.println("HTTP server started");
}

void loop(void){
  server.handleClient();
}

I did run into some problems, that I am still working through.  This little web-server not being kind to the older & slower TI.

I figured this out by utilizing telnet.  I would telnet into port 80, on the device, and I noticed that it didn't give very much time to issue HTTP commands like: [GET / HTTP/1.1]

I have been working though the timing by messing with ESP8266WebServer.h, that is part of the esp8266/Arduino libraries.

ESP8266WebServer.h
...
#define HTTP_DOWNLOAD_UNIT_SIZE 1460
#define HTTP_UPLOAD_BUFLEN 2048
#define HTTP_MAX_DATA_WAIT 1000 //ms to wait for the client to send the request
#define HTTP_MAX_POST_WAIT 1000 //ms to wait for POST data to arrive
#define HTTP_MAX_CLOSE_WAIT 200 //ms to wait for the client to close the connection
...

HTTP_MAX_DATA_WAIT is the value that seems to give the TI some time.

I noticed the ESP8266WebServer.h out in the GitHub project has some more timing settings:

I may want to upgrade the packages that I am using.

The good news is, I was able to turn a lamp on, from my TI-99/4A. :)

It is probably a better idea to have a modern server talk to the ESP8266 devices, and have the TI go through that.  That would allow more devices, and a centralized website created for all of them.   It would also eliminate having to play around with the timing on these.

Friday, April 29, 2016

Woods WiOn Indoor Wi-Fi Outlet Modification (Amazon Echo Too!)

I've acquired one of these smart device controlled outlets. It's really cool. You can turn 120v devices on and off, remotely, from your mobile device.

Modified WiOn:


I decided to open it up to see what is inside. I noticed that it uses the same module as the Adafruit Industries HUZZAH ESP8266 breakout board, that I happened to have bought last year.

I had to add the wiring, and push button, that would allow me to reprogram this device via USB.  I specifically utilized the Arduino IDE.

Pinout:


Sunday, May 20, 2012

Digital Spaces Traveler Under Linux & Wine

This is about my experience running Traveler under Wine/Xubuntu. This is not an installation manual or instructions of any sort. This is mostly my notes, that I figured others may be able to find useful.

Commands run to get Wine ready for Traveler in XUbuntu 12.04 & mint-xfce 14:

  • winetricks mfc42
Commands run if Traveler under Wine gets unruly:
  • wineserver -k

Keep in mind that this will kill everything running under Wine.

Desktop Shortcut:

Out of the box the traveler link did not work for me.  This is because traveler was installed under Program Files (x86). You may not have this problem.

I created a new launcher pointing to:
wine '/home/userprofile/.wine/drive_c/Program Files (x86)/DSTrav/apps/traveler.exe'

I also converted the icon file to a png to make it easier to use on my desktop:

Or the even more retro icon:

Audio:
The volume level for Traveler (or Wine) was substantially quieter than the rest of my system. Thankfully pavucontrol lets you adjust the volume for applications discreetly.

olsrvc.exe crashing:
Make sure that you audio input devices is not muted, in the linux host.

Wine AppDP - Traveler 2.03:
Latest Wine/Traveler combination status.
http://appdb.winehq.org/objectManager.php?sClass=version&iId=21871

Screenshot:

Just For Fun:
While at the St. Louis Sculpture Garden, I encountered a sculpture that reminded me of Traveler.


Updates:

  • 20130110 - Updated for XUbuntu 12.04
  • 20240413 - Updated for Linux Mint 21.2 Victoria